
I don’t know about you, but I love drawstring bags. They are so handy. They can be made in all sorts of different sizes and used for so many things; from toiletries to toys and everything in between. Use them as party bags for the kiddos or as a gift bag for a friend.
Use Your Stash
The bag I have designed is simple but depending on your choice of fabric it could look very elegant indeed. It could be embellished with buttons or embroidery stitches. In fact, the only limit is your imagination.
You don’t need any particular fabric either, so raid your stash and let’s start making.
The first thing is to decide how big you would like your bag to be. What are you going to use it for?
I decided to cut my fabric 10″ x 8″ (25cm x 20cm) approx. This gives the bag approx dimensions of 9″ x 7″ (23cm x 18cm).
I used the edge of the foot as a seam guide.
Materials to Make Your Drawstring Bags
You will need:
- main fabric
- lining fabric
- matching thread
- ribbon or cord approx 5 times the finished width of your bag
- sewing machine (optional) as these bags can be stitched by hand if preferred

Method:
- Once you know the size you would like your bag to be, cut 2 pieces of the main fabric and 2 pieces of the lining fabric. I cut mine 10″ x 8″. You may like to press the fabric at this stage.

- Pin the main fabric to the lining pieces, right sides together.


- Stitch along the top edge of the fabric pieces carefully.

- Press the seam allowances open.
- Take both pieces of fabric and place these right sides together, lining to lining, main to main, carefully matching the seams and pin in place.

- Before we can stitch the pieces together, we need to mark the openings for turning the bag the right way out and also where we want our ribbon/cord to be.
- Leave a gap of 3-4″ in the seam of the lining so that the bag can be turned inside out easily.

- Mark points on both side seams approx 1.5″ (4 cm) down from the top line of stitching and then 1″ (2.5 cm) below that. This will be where the ribbon or cord will be threaded.


- Stitch all the way around the edge of the fabric, remembering to leave gaps where indicated. Reinforce the stitches at the sides of the gaps with a couple or reverse stitches to strengthen them.
- Before turning your bag out, trim the corners to allow them to sit neatly.

- Carefully turn the bag right sides out. Make sure you get into the corners for a neat finish.
- Now handstitch the gap in the lining with a simple ladder stitch.

- Ease the lining into the main fabric and press gently making sure all of the seams are neat.

- After you have pressed the bag, and you are happy with the lay of the lining, top stitch close to the top edge.


- After making sure the side seams are lying flat inside, stitch two lines all the way around the bag from the points marked at the seams. It may be easier to draw lines across the fabric for this, but make sure you can remove them easily afterwards.

- Take the ribbon / cord and cut two pieces as shown below.
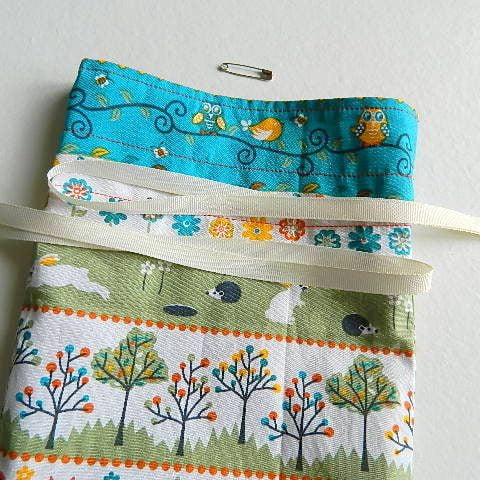
- Using a safety pin, thread one piece of ribbon from one side, thread all the way around and bring it back out at the same side. Knot. Repeat from the other side with the remaining ribbon.


- Press well…et voila! You have a gorgeous, bespoke, drawstring bag! To close, pull on both ribbons/cords at the same time.


These little drawstring bags are so easy to make, you’ll be making them for everyone! Have fun and if you take any photos I’d love to see them, just use #gmdesigns on Twitter and Instagram and I’ll take a look.
Until next time…
Gaynor xx