This week on the blog I’m looking at how to insert an invisible zip.
Zips are a fantastic invention, thank you Mr Whitcomb L. Judson (1893), but the nemesis of many a sewer!
They have the reputation for being difficult to use. However, if you take your time and follow a few basic guidelines they are really quite straightforward.
Types of Zip
Zips themselves come in a number of guises: the two that are regularly used in home furnishings are nylon coil and metal. They are available in a whole rainbow of colours and a large number of sizes.
I tend to use nylon zips as there is no chance of them rusting if washed.
Continuous zips are extremely useful for larger items and upholstery projects. The teeth part of the zip comes on a roll which you then cut to the required length. A number of slides may be included and you can usually buy extra.
Zips can be tricky, but if you use a zipper foot on your machine and take it step by step, you can do it.
As my background is in soft furnishings I will be sharing information relating to home decor rather than fashion, although certain things may be transferable.

Practise makes perfect
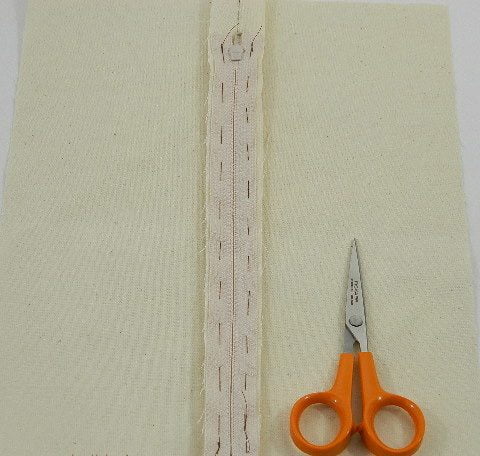
You can see that I’ve used spare pieces of fabric in order to show you the techniques and I’ve also used a contrasting thread so that it is easier to see where I have stitched. This is a good way to practise before making up your project as it means you will not spoil any expensive fabric should you need to unpick any first attempts.
Which method should you choose?
The first thing to consider is how do you want your finished project to look. This will determine the method to use.
There are a number of methods for inserting zips:
- invisible zips
- semi-concealed zips
- concealed zips
- exposed zips
For example, if you are making a cushion cover, is it important to you that the zip is completely hidden or would you like to incorporate it as a design feature? It is entirely your choice.
The next thing to consider is how long your zip should be.
This will depend entirely on what you are making. For example, if you are making a cushion cover, the opening for the zip will need to be wide enough to insert and remove a cushion pad without too much of a struggle.
Practising all of the techniques is valuable experience and you may find your preference by trying them all.
If you are still unsure, have a look on Pinterest and get a feel for the kind of style you prefer and take it from there.
In order not to overwhelm you, I will show you one technique each week from the list above starting with: invisible zips.
Invisible Zips:
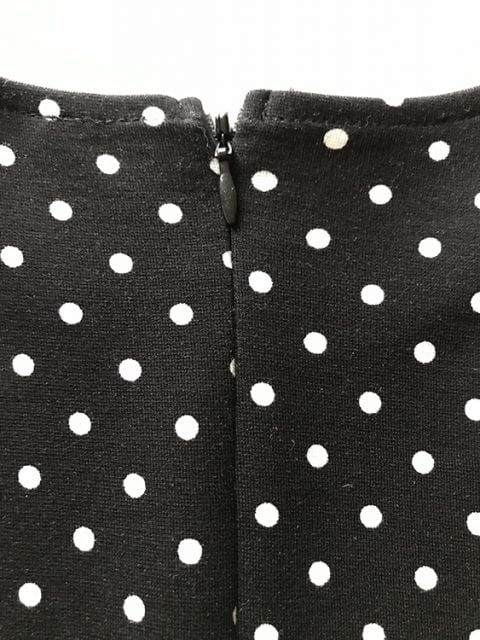
This method means the zip will not be visible on the right side of the fabric on your finished project.
- useful when a good colour match is not available
- or when any other type of zip insertion would break up the pattern on the fabric
- ideal for fabrics that are difficult to sew
A special invisible zipper foot may be available for your machine, although a standard zipper foot may be used just as effectively.
Method:
- Cut your fabric to the size required for your project and place the two pieces right sides together.
- Using a large machine or tacking stitch close the seam. Press open.


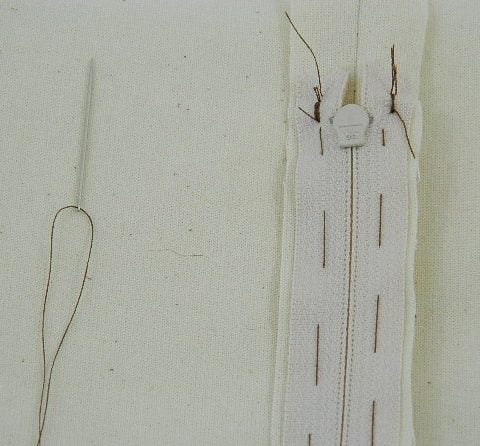
- Place the closed zip on the wrong side of the seam, making sure the teeth are centred over the join.
- Tack both sides of the zip in place, attaching it ONLY to the seam allowance NOT through to the right side of the fabric.
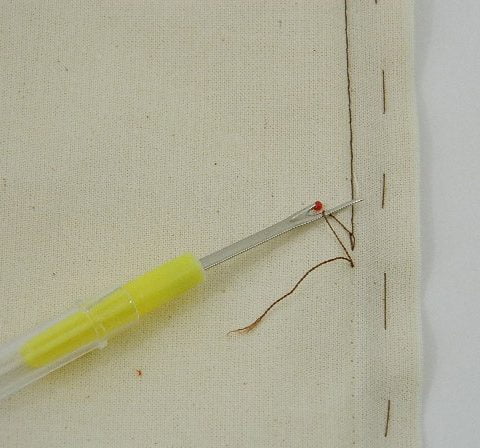
- Remove the original tacking stitches that held the seam closed and open the zip to its base.
- Open out the fabric and machine or backstitch down each side of the zip next to the teeth, stitching through the zip tape and seam allowance only and working from the wrong side of the fabric. Sew down as far as the slider.
- Keeping the needle in the down position, raise the zipper foot and move the slider up a little and sew to the end of the tape.


- Repeat on the other side of the zip. Remove tacking stitches.


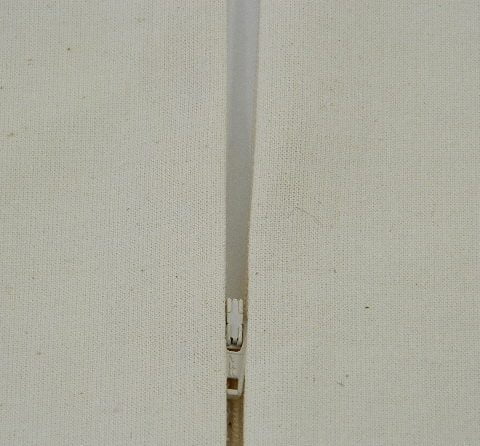
As you can see, neither the zip nor the stitches are visible from the front of the fabric.
I hope you find this series useful.
If you have any questions please do not hesitate to contact me or leave a comment below and I will do my best to help.
Next time: semi-concealed zips.
Until then…happy sewing!

And this is not a invisible zipper…and invisible zipper is totally different than your standard zipper you have used in this application.
Thank you for taking the time to read my post.
“Invisible” is the method of insertion I am referring to, and that is how it is described here in the UK. Invisible zips themselves are available and are more readily used in dressmaking, as seen in the black and white photo.