• Skip to main content
  • Skip to secondary menu
  • Skip to primary sidebar
  • Skip to footer

Gaynor Marshall | Illustration and Surface Pattern Design

creating images that evoke a sense of childlike wonder, a helping of whimsy and just a touch of magic along the way

  • Home
  • About
  • My Work
    • Copyright
  • Blog
    • Halloween
    • My Arty Book Journey
    • Nature & Wildlife
    • Personal
    • Disclosure Policy
  • Free Goodies
  • Get In Touch
    • Cookie Policy
    • FAQ’s
    • Privacy Policy
    • Terms & Condition’s
Home » Zips, Part 4: Exposed Zip

Zips, Part 4: Exposed Zip

February 11, 2018 By Gaynor Marshall

This week, in Part 4 of my “How to insert a zip” series, I’ll be explaining how to insert an exposed zip into your projects.

What is an exposed zip?

With this method the teeth of the zip are completely exposed and therefore the zip becomes an intrinsic part of the overall design.

exposed_zip

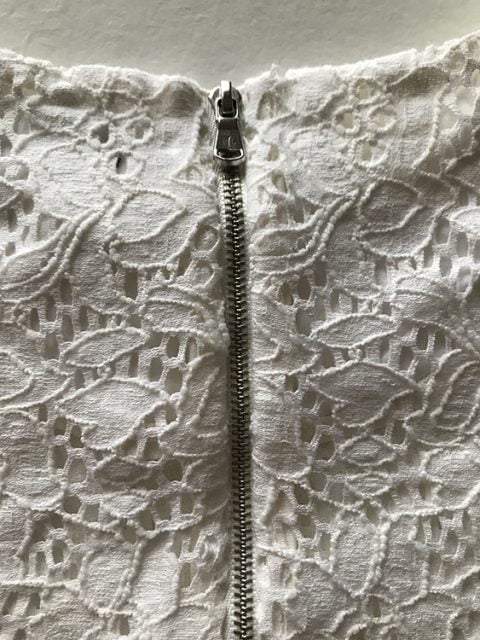
This type of insertion can be used in a more decorative way.

For example:

  • use a contrasting colour zip to make it pop out of the fabric
  • use on the edge of the cushion in the seam itself either with or without piping
  • place diagonally across the panel for a funky twist

As always, when using a sewing machine it is better to use a standard zipper foot.

Did you know?

YKK is the largest zip manufacturer in the world. It makes zips in 9,500 colors and has 20 shades of black in its colour library.

Materials:

  • fabric
  • thread
  • zip
  • zipper foot

Method:

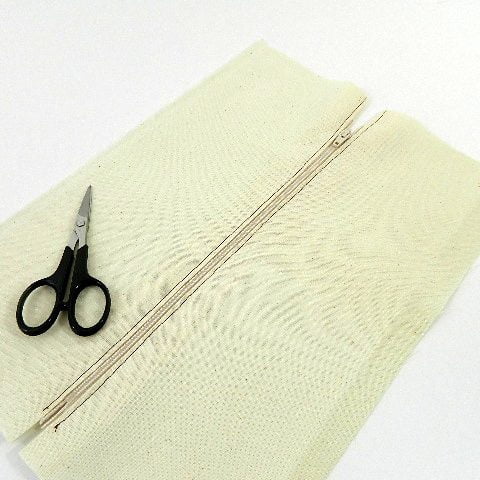
  • Cut your fabric pieces to the correct size.
  • Press a seam allowance along two edges where your zip will be attached.

press_seam_allowance

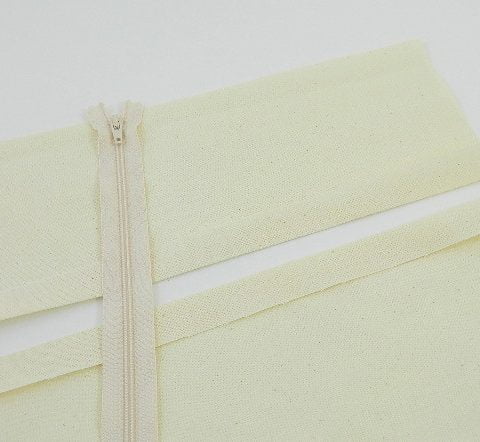
  • Place the zip face up and position one of the fabric pieces at the edge of the teeth.
  • You may wish to tack or pin it in place.
  • Stitch close to the edge of the fabric, taking care not to cover the teeth of the zip.
  • Repeat on the other side.

stitch_close_to_teeth

exposed_zip

There you have the fourth method of zip insertion, and I think the easiest to achieve.

What have we learnt?

I hope you have enjoyed learning about the various methods for inserting zips and I hope I have been able to demystify the whole process and show it really is quite straightforward if you take it one step at a time.

Over the course of these tutorials I have shown you 4 easy step by step methods for inserting zips into your sewing projects.

We looked at invisible zips, semi-concealed zips, concealed zips and exposed zips. They are all available here.

The uses for each method are varied, and many can be used for the same project.

Most of the time it will depend on how you the designer would like your finished project to look.

Experiment and play around with the different types.

all_styles_of_zip_insertion

Although not exhaustive, these tutorials explain the basics of working with zips and by following them you will soon be able to use your new skills with confidence.

Please feel free to pop any questions in the comments section below or send me an email and I will do my best to help.

Until next time…happy sewing!

blog_signature

facebookShare on Facebook
TwitterTweet
FollowFollow us
PinterestSave

Filed Under: Sewing, Sewing Tips for Trouble Free Sewing, Tutorials, Zips Tagged With: cushions, exposed zip, fastenings, home decor, insert an exposed zip, interior design, learn how to insert a zip, sewing tutorial, zippers, zips

Primary Sidebar

Search

The Creative Introvert Club

I'm taking a look at what it means to be a creative introvert in the world of today. Join me for the highs, the lows (are there any?) and the revelations!

Daily Wellbeing Pages (pdf)

Living in our modern busy world, it’s more important than ever to nurture ourselves and our environment. Juggling family life, work, friends and other commitments can mean our own wellbeing sometimes takes a back seat.

With these simple daily check in pages you can spend a few minutes each morning and evening to plan and review your day.

Now Only £1.49

Creative Goddess Bundle (pdf)

Running a creative business, or indeed any business, is tough. So anything that helps make the process a little easier has to be a good thing, right?

That is exactly why I have designed these goal planning pages. They are specifically set out to help you see what your overall goals are and to break them down in to manageable monthly, weekly and daily activities.

Now Only £1.49

Footer

member of SCBWI (Society of Children's Book Writers and Illustrators)

Let’s Be Friends

Instagram
Facebook
Twitter
Visit Us
Follow Me
YouTube
Cute bear illustration encouraging people to shop small.

Copyright © 2017-2023 Gaynor Marshall

We are using cookies to give you the best experience on our website.

You can find out more about which cookies we are using or switch them off in .

Gaynor Marshall | Illustration and Surface Pattern Design
Powered by  GDPR Cookie Compliance
Privacy Overview

This website uses cookies so that we can provide you with the best user experience possible. Cookie information is stored in your browser and performs functions such as recognising you when you return to our website and helping our team to understand which sections of the website you find most interesting and useful.

Strictly Necessary Cookies

Strictly Necessary Cookie should be enabled at all times so that we can save your preferences for cookie settings.

If you disable this cookie, we will not be able to save your preferences. This means that every time you visit this website you will need to enable or disable cookies again.

Cookie Policy

More information about our Cookie Policy