Make a dreamcatcher following my simple step by step instructions.
Read about the history of the dreamcatcher and how you can create your own using a few simple items.
Once you have learnt the basics you can be as creative as you wish with the embellishments you have.
Think outside the box, dreamcatchers make great Christmas tree ornaments too.
However you decide to use yours, have fun!
What is a dreamcatcher?
A dreamcatcher is a wooden or metal hoop decorated with a web of cord or sinew and decorated with beads and feathers.
Traditionally, dreamcatchers were hung on the cradleboards of newborns. They were intended to protect them from bad dreams while they slept and to entertain them when they were awake. The bad dreams were caught on the web and evaporated with the first rays of the morning sun. The good dreams passed through the small hole at the centre of the web and into the sleeper below.
Through their consistent oral traditions the Ojibwe have ancient stories about the dreamcatcher, how it “came to be”, why it is used and how it should be made. They are credited with creating the earliest versions.
It is worth noting that the traditional methods of creating dreamcatchers can no longer be followed exactly as Government laws forbid the sale of feathers from sacred birds and the use of deer sinew for the webs, therefore modern alternatives have been sought.
Where should I hang my dreamcatcher?
Modern babies sleep in cots or cribs so they can be hung on the wall above these, or in the case of older children and adults they can be hung over their beds. In this position it can catch any “bad dreams” in its web, and allow “good dreams” to pass through the small central hole and into the sleeper below.
Are the colours of the dreamcatchers significant?
Colour symbolism does play a key role in tribal culture with regard to many things, however, the colours used in most modern dreamcatchers are for decorative purposes only.
What do the feathers represent?
A feather placed in the centre of a new baby’s dreamcatcher represented the breath or air. As it danced in the wind it was a source of entertainment.
The feather of the owl would be used for wisdom (a woman’s feather), and the feather of the eagle would be used for courage (a man’s feather). Their use would not necessarily be restricted by gender, but the user would be aware of the gender properties they were invoking.
Make your own dreamcatcher
Materials:
- wooden hoop
- approx. 5m cord
- selection of beads
- feathers
- ribbon
- glue
Instructions:
(NB: These instructions are for right-handers so left-handers may want to reverse the directions when weaving.)
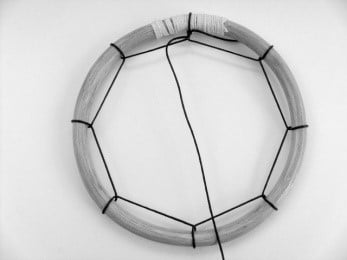
- Take the cord and tie a knot at the top of the hoop.

- Begin to weave the first part of the web as shown below. A variety of looks can be achieved by varying the number of points you use to attach the web to the hoop. Some people have specific reasons for the number of points they use. For example, in honour of Spider woman 8 points would be used to represent her 8 legs.
- The entire first row should be loosely woven.

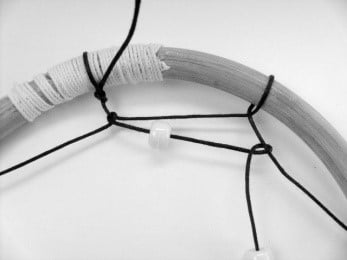
- Now continue to weave the web attaching it to the thread this time. As you tie these hitches you should begin to pull each stitch in the web snugly, but not tight.
- Continue around the web tying a hitch and pulling tighter each row. You may start adding a bead or two along the way, until you are down to a small hole in your web.
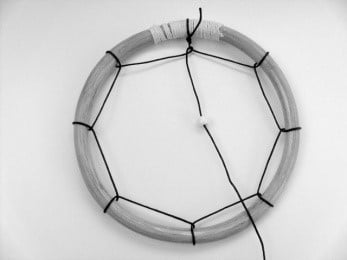
Alternatively, you may just add one bead in the very centre of the web.
- At the point you want to finish your web, tie a double half hitch knot over the middle of the next section. Pull tightly.

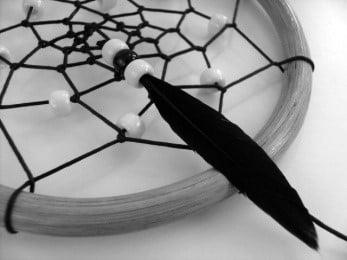
- Attach feathers and beads to the centre of your dreamcatcher, by threading on the desired selection of beads. Secure using a double knot.
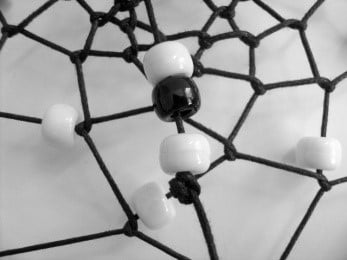
The feather can now be pushed through the beads and secured with a dab of quick-drying clear glue. Any excess cord or visible quill tip can be trimmed once the glue has dried.

Additional feathers and beads can be added around the edge of the hoop in a similar way.
Firstly, take two or three lengths of cord, approximately 30cm each and attach as shown.
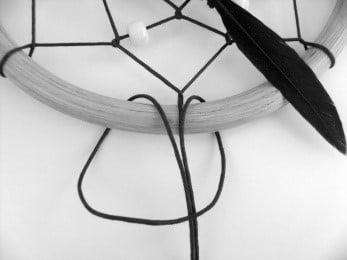
These cords may be attached at the mid-point, lower quarter and/or the bottom point. The choice is yours.

Thread on the beads and feathers and secure and trim as before.
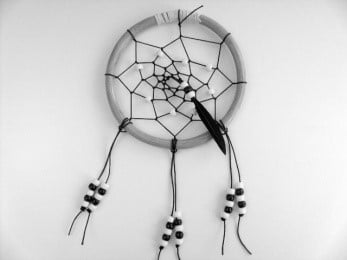
The finished length is also a personal choice.

Thread on the beads and feathers and secure and trim as before.
- Take a piece of cord or ribbon approximately 40cm and tie at the top of the hoop. You can now hang up your dreamcatcher.

Always supervise children when crafting. Dreamcatchers are NOT toys.
I hope you have enjoyed this tutorial. If you are inspired to create your own dreamcatcher please feel free to share using #gaynormdesigns over on Instagram.
Until next time…
Gaynor xx