• Skip to main content
  • Skip to secondary menu
  • Skip to primary sidebar

Gaynor Marshall | Sewing and Design

Designing Calm, One Stitch at a Time

  • Home
  • Store
  • About
    • Copyright
    • Disclosure Policy
  • Blog
    • The Cottagecore Aesthetic: Understanding What it is and How to Use it
    • Crafting for Wellness
      • Mindful Crafting: Unlock Creativity and Transform Wellbeing
    • Discover the Inventor of the Sewing Machine: A Fascinating History
    • Sewing
      • Spring Sewing Delights: Fresh Projects to Celebrate the Season
      • Sewing Essentials: Setup & Success
        • How to Set Up an Inspiring Sewing Workspace at Home
        • Sewing Tools: My Essential Top Ten
        • Stitch Library – Ultimate Guide
        • Successful Sewing: My 5 Secrets
        • Thread Basics: The Ultimate Beginner’s Guide to Sewing and Embroidery
    • Tutorials
      • Buttons: Make Your Own
      • Creative Ways to Use Machine Embroidery for Stunning Projects
      • Drawstring Bags: Make Your Own
      • Creative Embroidery Templates: Think Outside the Box for Unique Designs
      • Mini Bunting Make Your Own
      • Take Your Sewing to the Next Level
      • Zips
        • Zips, Part 1: Invisible Zip
        • Zips, Part 2: Semi-concealed Zip
        • Zips, Part 3: Concealed Zip
        • Zips, Part 4: Exposed Zip
  • Get In Touch
    • Cookie Policy
    • Privacy Policy
    • Terms & Conditions
Home » sewing machine

sewing machine

Sewing Tools: My Essential Top Ten

November 19, 2017 By Gaynor Marshall

sewing_machine

There are a bewildering array of sewing tools available for today’s sewers. Today I want to share with you my choice of what I consider to be the essential sewing ones. I don’t mean the latest trendy gadgets, I mean the basic, tried and tested can’t do without tools of the trade.

Sewing Tools of the Trade

sewing_tools

Sewing Machine

If you are considering purchasing a machine for the first time, consider carefully what you actually want to be able to sew. Chances are you won’t need an all singing all dancing quilting or embroidery machine if you are just starting out.  

I would suggest that you don’t buy a very basic machine because you will find you outgrow it rather quickly.

For most soft furnishing or dress making projects a mid-range machine, either computerised or mechanical will be suitable.

Most sewing shops encourage you to try before you buy, to make sure you find the right machine for you, so pop along to your nearest showroom and have a play. Ask lots of questions and think about what you really want to use your machine for.
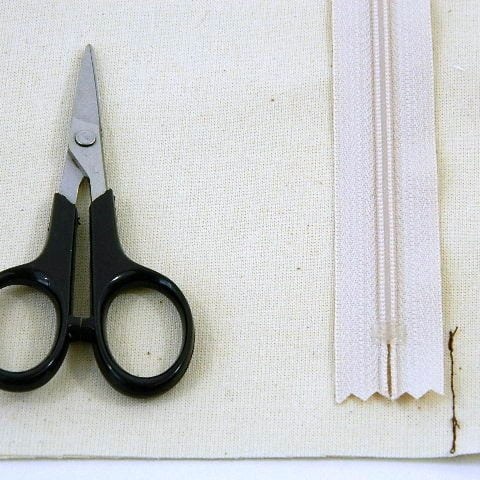
Scissors

You should try to purchase the best scissors you can afford. If you are left handed buy left handed scissors. Some scissors can be held in either hand, but left handed scissors have the blades the opposite way round making it easier to see what you are cutting.

The most important thing to remember about your fabric scissors, is only ever cut fabric with them. Cutting paper will blunt them and even if you sharpen them, they will never be the same again.

Pins

My preference are glass headed pins. Whatever type of sewing you do, you can be sure there will be lots of ironing involved and glass headed pins will not melt if you accidentally iron them.

Cutting Mat

These are a very useful addition to your craft room, as they protect your work surface from damage and are an absolute necessity if you use a rotary cutter.

They come in various sizes and are generally double sided; metric on one side and imperial on the other.

Originally they were all green but now they come in lots of lovely colours if you shop around.

Seam Ripper

This unassuming little tool is invaluable. It makes unpicking stitches a quick and easy task.

It can also be used to gently feed fabric underneath the presser foot and is extremely good for carefully opening buttonholes.

Rulers

Depending on the job in hand, there are a number of options.

For large projects like curtain making, a steel metre ruler is the best option, it gives a true straight line and its large size makes measuring long lengths easier.

Plastic rulers specifically designed for patchwork and quilting make measuring and cutting easy. I would suggest a 6″ square and a 6″ x 24″ oblong ruler as a starting point.

For measuring seams and hems little hem guides are an amazing invention.

Rotary Cutter

These come in a number of sizes and are ideal for patchwork and quilting.

They must always be used in conjunction with a cutting mat and with due care and attention. The blade should always be covered or retracted before the rotary cutter is put down, this helps to avoid accidentally cutting yourself on an open blade.

Always cut away from yourself and keep fingers out of the way. Only use patchwork and quilting rulers with a rotary cutter as ordinary rulers are not made to withstand their use.

Pincushion

You will definitely need a safe place to keep all of your pins. A pincushion is very practical because you can pick them up easily whenever you need them.

Making your own is also a great use for your scrap fabric. They can be as fancy as you like, take a look on Pinterest for inspiration.
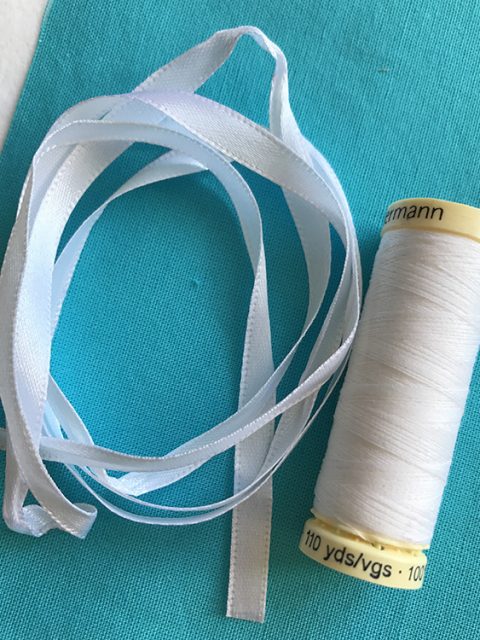
Thread

After spending time, energy and love creating your projects you want them to last. Using good quality thread means seams and finishes are more likely to stand up to everyday life.

Check out my post on choosing the correct thread for your project here.

Steam Iron

As I mentioned before, sewing actually involves a lot of ironing but this doesn’t mean you have to buy a really expensive iron. When I upgrade my everyday iron at home, I put the old one in my sewing room.

Although, you may not use much steam for quilting and patchwork, it’s always handy to have the option for other projects.

I hope you find this list useful. If you have any comments or questions I’d love to hear from you.

If someone you know would find this list helpful, please feel free to share.

Until next time…

Gaynor xx

Creative Ways to Use Machine Embroidery for Stunning Projects

November 5, 2017 By Gaynor Marshall

pink_hoop_art_4

Design your own fabric using decorative machine embroidery!

I’m sure you’ll agree, beautiful fabric is one of lifes’ necessities…erm…ok…luxuries; the colour, the texture, the feelings it can evoke, the endless creative possibilities. You’ll also be aware of how expensive good quality fabric can be. I’m not trying to talk myself out of my surface design job, but I want to share a quick and easy way to create gorgeous, unique fabric using only plain fabric and thread.

Decorative Machine Embroidery.

Your sewing machine is a fabulous tool. A very, under-used tool. Most of the time, the only stitch we use is the straight stitch; much needed and very necessary when sewing seams, but not the only one available.

Even if you have an entry level sewing machine, it will have a good handful of utility and decorative machine embroidery stitches. Have a look. If you create a stitch library you will be able to see at a glance the array of stitches available to you.

I have designed a number of projects suitable for using any of the stitches you have on your machine. Use them to create home decor items, either for yourself or to give to a loved one or friend.

 Projects.

1. Pincushion

The first project I want to share is a pincushion. Very simple to put together but very stylish and no one anywhere will have one the same style.

turquoise_pin_cushion_1

  • I wanted to create a 6″ (15cm) finished pincusion. I cut 2 squares of main fabric and two squares of lining measuring 6.5″ x 6.5″ ( 16cm x 16cm approx.). You don’t have to use lining fabric you could use stabiliser, thin wadding or anything you have to hand for the inside.

fabric_pieces

  • Using two contrasting colours makes a bigger impact.
  • For the turquoise side I used a bright pink thread and for the green side I used a turquoise thread. I find the best thing to do is to draw a straight line with an air erasable pen so that your first row of stitches is straight. It doesn’t matter whether you start at the edge of your fabric or the centre, I prefer to start in the centre and then space the rows evenly either side.

stitches_on_machine

  • You may choose to sew a random selection of decorative embroidery stitches, or you could mirror them to create a further interesting design feature.
  • Once both your fabric pieces are complete, place them right sides together and sew them together using a straight stitch, remembering to leave a small gap for turning.

decorative_stitches_right_sides_together

turn_out

neaten_seams

  • When you have turned the pincushion out and you are happy with the corners, stuff it firmly with toy or craft stuffing. The trick when stuffing anything is to use small pieces until it is firm and evenly filled.
  • Hand sew the gap using a ladder stitch.

stuff_pin_cushion

embroidered_turquoise_pincushion

  • I also rotated the fabric pieces, so that on one side the stitches ran top to bottom and on the reverse they are side to side. Another design feature for a totally bespoke pincushion.

2. Scissor Keeper

The instructions for making scissor keepers is almost identical to those for a pincushion. The only difference, apart from size, is you need to add a piece of ribbon or cord before you stitch the two pieces together.

For reference my scissor keepers measure 2″ x 2″ and 3″ x 2.5″ finished sizes (5cm x 5cm & 7.5cm x 6cm approx). Add 1/4″ (1cm) for the seam allowances.

materials_for_scissor_keeper

scissor_keeper_adding_ribbon

  • Carefully tack / baste the ribbon in place before stitching the outer pieces together.

stuff_scissor_keeper

These handy little notions can be made in a variety of sizes for different scissors and can even be used as keyrings.

turquoise_scissor_keeper

scissor_keepers

pink_scissor_keeper

3. Hoop Art.

Use fabric in an embroidery hoop as a modern style of wall art.

These clever little inventions lend themselves perfectly to home decor. Arrange them in groups of varying sizes to add interest to a plain wall.

  • To crate your own hoop art, choose the hoop size you wish to use and stitch your fabric. Make sure the piece of fabric you use is big enough to fit inside the hoop.
  • Trim the fabric piece by using the inner hoop as a template and fix onto the frame.

pink_hoop_art

Display proudly on your wall!

4. Wall Art.

Another idea is to stitch a panel of fabric using decorative machine embroidery stitches and display in a box frame. I created a simple design by using one stitch in the centre of the panel and then I mirrored the outer stitches to form a balanced design.

embroidery_black_frame

embroidery_black_frame_1

embroidery_white_frame_1

Use more than one colour and see the different effects you can achieve. A rainbow of colours would look stunning.

I hope you enjoy creating your own fabric using the decorative machine stitches on your sewing machine. Feel free to share photos of your makes using #gaynormdesigns over on Instagram, I’d love to see them.

Until next time…

Gaynor xx

Successful Sewing: My 5 Secrets

October 29, 2017 By Gaynor Marshall

pincushion_in_pins_fabric

The Secrets to Successful Sewing

I have 5 secrets to successful sewing and they will probably surprise you.

Sewing is a skill that we have to learn and not something we are born with.

Sometimes people refuse to learn anything new because they may feel vulnerable, but that’s how we grow. Staying inside our comfort zones is safe but it also means that we never experience anything new.

Read on to discover my 5 secrets to being successful, not just at sewing but anything creative.

1. Remember You Are Awesome.

Surprisingly, being successful at something creative, whether that’s sewing, baking, painting, knitting or something else, isn’t simply about having the latest, most expensive equipment or the largest studio in the most fashionable part of town. It’s much more fundamental than that.

It’s about YOU!

You are the one who has to put in the time and effort into your chosen field of study and practise. Again and again.

2. Practise Makes Perfect.

You don’t have to make complete projects every time you sew, just allow yourself time to play and experiment.

Make use of that basket of scraps, experiment with the stitches on your machine, treat yourself to a few new spools of thread. Check out my beginners guide to thread here.

embroidered_turquoise_pincushion

jewel_coloured_threads

I’ve seen so many people panic about creating something because they’ve never attempted a particular project before. However, if you are used to handling different fabrics and sewing notions, it becomes much easier to learn a new technique.

Successful sewing really is about building your confidence.

I’m not saying that by playing we’ll all suddenly become experts in everything, far from it. What I am saying is, if you familiarise yourself with the various aspects of your craft, you broaden your experience and expand your skillset.

For example, if you practise inserting zips, the next time you have to insert a zip into a cushion or a piece of clothing, you will at least have an understanding of the process. You will be familiar with it and it won’t be so scary. Use small scraps of fabric and keep them for future reference.

zip_sample

3. Handmade Not Homemade.

My mission is to encourage people to take up sewing and embrace all that that entails. To have a go, have fun and learn new skills. Join a sewing group in your area and make new friends.

Everyone makes mistakes, it’s part of the learning process. Your unpicker will become one of your best friends, believe me, I speak from experience! But, on the other hand, wobbly seams and uneven hems are not the end of the world and the next time you tackle them they will be much better.

However, I am not about cutting corners and making do.

It saddens me when I hear people say things like “life’s too short to hand close a seam”. Really? You would rather finish a beautiful bag by machine stitching the lining closed because it may take a couple of minutes to hand sew it with an invisible ladder stitch?

simple_ladder_stitch

In my opinion, if you are going to learn how to do something, you should at least learn how to do the basics properly.

4. Learning Resources.

I mentioned joining a local sewing group, but there are lots of options for you to consider when starting your successful sewing journey.

There are plenty of free videos and tutorials around, but be selective. Not all of the contributors are qualified or experienced, so my advice is to take recommendations or at the very least follow someone reputable.

Workshops are a wonderful place to start and can be less expensive and less time consuming than committing to a course of lessons. Being with a tutor is sometimes a better way to learn new techniques, especially if you are a kinaesthetic or hands on type of learner.

Sewing groups on social media can be a good source of information and support, again make sure they can offer what you need.

Last but not least, invest in a book or two.

5. Have Fun.

The main thing to remember on your journey to successful sewing, is to have fun.

Don’t be afraid of making mistakes, we all make them. The trick is to learn from them so that we don’t knowingly repeat them.

Enjoy the process and be proud of the things you make.

If you’d like to share photos of your creations, you can share them over on Instagram using #gaynormdesigns. I’d love to see them.

Until next time…

Gaynor xx

Ultimate Stitch Library: Your Go-To Guide for Every Stitch

September 24, 2017 By Gaynor Marshall

stitch_sample

A stitch library is something every sewist should make.

“I finally bought the sewing machine, now what?”

I bet this question resonates with lots of people who’ve bought a sewing machine. You’ve dreamt of the day you can fill your world with things you’ve sewn yourself. The entire new wardrobe of clothes you’ll be able to make, the curtains and cushions…lots and lots of cushions.

You’ve spent weeks, months even years choosing just the right machine; you’ve watched all the shopping channels until you know as much about the technical aspect of all their machines as the presenters.

However, now you actually have the longed for sewing machine, what do you do? Where do you start?

Rainbow_threads_and_fabric

This scenario reminds me of the time, shortly after hubby and I got married; you know back when the world was still in black and white (as my boys thought when they were little!), when we bought our first microwave. I thought it was really exciting, hubby not so much, his mum already had one.

Anyway, we brought this cool, modern gadget home. This was going to save so much time, the gas cooker will just gather dust now, surely. Well, there it sat on the worktop and we stood and admired it, we read the manual, we read the suggested recipes. What though, should we actually cook first? No idea. We re-read the recipe suggestions. No. Nothing was jumping out.

Eventually, we heated something up, beans, I think. The point was, we were at a bit of a loss as to what we should do first. We, had been so caught up in having a microwave that we didn’t really plan beyond buying it, and that’s how many people feel when they open their first sewing machine at home.

Juno_and_my_new_machine

Well, the first thing to do is take it out of the box. It’s okay to sit and admire it for a while; you can make a cuppa, take out the manual and read it.

Familiarise yourself with the basics of the set-up and following the instructions in the manual, thread your machine. Practise a few rows of straight stitching on a scrap piece of fabric to check everything is working correctly.

At this point, unless you have a definite plan of action it would be so easy to put everything away. You know how it all works, you’ve had a little sew. Well, I suggest you do this instead…

You will have noticed that in the manual and probably on the machine itself there is a library of stitches. This is a very handy reference guide for the number and type of stitches that your particular sewing machine can produce. However, as these are printed images, they can sometimes appear slightly different when you stitch them. One great way to see what the stitches on your machine look like in real life is to stitch them; create your own stitch library.

stitch_sample

It’s much easier to see all of the stitches this way, you can alter the stitch length and width to compare to the default stitch and you’ll have this for future reference.

Cut out two pieces of fabric; I used my long ruler as a measure and I chose the full width of a piece of linen and a piece of spare lining fabric.It’s much easier to see all of the stitches this way, you can alter the stitch length and width to compare to the default stitch and you’ll have this for future reference.

long_ruler_scissors_and_pen

It doesn’t matter if you have a basic machine with a handful of stitches or a top of the range model with hundreds, doing this exercise will enable you to create a very useful chart, get to know your machine and practise your sewing skills, all at the same time.

stitch_library_samples

The main thing to remember is to have fun! Making a stitch library will boost your confidence and when it’s finished, you’ll have something pretty to look at too!

Until next time…

blog_signature

Discover the Inventor of the Sewing Machine: A Fascinating History

September 19, 2017 By Gaynor Marshall

Have you ever wondered who invented the humble sewing machine? As I sew for a living, I thought I’d do a little research and share my findings.

The discovery that this everyday object emerged from very complicated origins may surprise you.

Who invented the Sewing Machine?

There are many claims to who originally invented the sewing machine, so I’ve tried to glean the main contributors from the rest of the pack.

The most prominent dates and names are listed below:

18th Century

1755 – Charles Fredrick Wiesenthal invented the first known mechanical device for sewing. He was awarded a British patent for his invention.

1790 – Thomas Saint is credited with the invention the first sewing machine design using a basic chain stitch. Unfortunately, he did not market or advertise his invention.

Thomas_Saint_sewing_machine_1790
Thomas Saint 1790

19th Century

1804 – a sewing machine was built by the Englishmen, Thomas Stone and James Henderson, also in this year, a machine for embroidery was constructed by John Duncan in Scotland. Sadly, neither of these machines were successful.

1807 – Austrian tailor, Josef Madersperger began developing his first sewing machine. He presented his working machine in 1814.

1829 – Barthelemy Thimonnier, a French tailor invented the first practical and widely used sewing machine.

Barthelemy_Thimonnier_Sewing_Machine
Barthelemy Thimonnier Sewing Machine 1829

1832 – Walter Hunt invented the first American lockstitch machine. He eventually patented it in 1854.

1841 – British partners, Newton and Archibald, introduced the eye-pointed needle and the use of two pressing surfaces to keep the pieces of fabric in position.

1842 – John Greenough patented the first sewing machine in the United States.

1844 – John Fisher managed to combine all the elements of the previous inventions into one recognisable machine. His original patent was lost in the patent office meaning that he had to watch his contemporaries earn their fortunes instead of him.

1845 – Elias Howe created his machine in Massachusetts. After trying to attract interest in his machine in England he returned to America. He discovered that a number of people, including Isaac Merritt Singer,  had been infringing his patent. He took the case to court and won the right to claim royalties from the other manufacturers, including Singer.

Elias_Howe_Patent_howe_sewing_US_4750
Elias Howe Patent howe-sewing-US-4750


Elias_Howe_1845_the_first_functional_lockstitch_machine
Elias Howe 1845 the first functional lockstitch machine

1851 – Isaac Singer eventually created an improved version of the sewing machines of the time and as a result he was granted an American patent in 1851. 

Isaac_Singer_sewing_machine
Isaac Singer sewing machine

The Sewing Machine War

Throughout the rest of the decade so many patents were applied for it became known as the Sewing Machine War.

1856 – Isaac Singer, Elias Howe, Nathaniel Wheeler, Allen B.Wilson, Grover and Baker pooled their patents. This meant that all other manufacturers had to purchase licenses and pay $15 per machine. They called themselves the Sewing Machine Combination. This lasted until the last patent expired in 1877.

1874 – William Newton Wilson found Saints’ drawings, made adjustments to the looper and built a working machine. This machine is currently owned by the London Science Museum.

William_Newton_Wilson_sewing_machine
William Newton Wilson sewing machine

Moving forward

The lesson to learn from this story is that you don’t need to keep re-inventing the wheel. Charles Frederick Wiesenthal was the first person to invent a mechanical way to sew, however, that did not preclude others from exploring the idea.

That said, it isn’t acceptable to simply copy someone else’s intellectual property, as Isaac Singer found to his cost.

Improving the Design

People kept trying to improve on existing designs. They tweaked the stitching method, made the machines more elaborate and even adapted them to use electricity when the time came.

We are continually re-imagining and building upon previous ideas and practices. We develop them, add our own twist and make them unique. That’s what makes our beautiful world go round.

Until next time…

blog_signature

Primary Sidebar

Printable Downloads

Search

Join My Substack

Copyright © 2017-2026 Gaynor Marshall

We are using cookies to give you the best experience on our website.

You can find out more about which cookies we are using or switch them off in .

Gaynor Marshall | Sewing and Design
Powered by  GDPR Cookie Compliance
Privacy Overview

This website uses cookies so that we can provide you with the best user experience possible. Cookie information is stored in your browser and performs functions such as recognising you when you return to our website and helping our team to understand which sections of the website you find most interesting and useful.

Strictly Necessary Cookies

Strictly Necessary Cookie should be enabled at all times so that we can save your preferences for cookie settings.

Cookie Policy

More information about our Cookie Policy